I am not a huge cookie fan. Perhaps it's because my dad made cookies on a very regular basis when I was a kid ... and they always came out hard. (I hate hard cookies ... except for Oreos.) Perhaps it's because I prefer to enjoy something more interesting and flavorful and texturally interesting when I consume empty calories. At any rate, I've never been a big cookie fan and I've never been a great cookie baker ... until a few weeks ago when the clouds parted and a cookie goddess condescended to share her secrets with me. Now, not only do I like cookies, I can make really good ones -- the beautifully puffy kind that stay soft overnight. So long to those anemic, flatter-than-Kansas cookies that I get every time I try following the recipe on the back of the Nestle chocolate chip bag.
This recipe is not for those who have a CCC craving that needs immediate satisfaction. Nope. For that, I suggest you go to the store and buy a bag of SoftBatch cookies. No, this recipe requires advance planning, but that forethought definitely pays off. The recipe is supposed to be secret, but I just can't keep a food secret this good. So, with apologies to the cookie goddess, here's the ultimate fail-proof, stay-soft-for-days (if they last that long) chocolate chip cookie recipe.
Chocolate Chip Cookies
2 sticks butter, softened
1 cup sugar
1 cup brown sugar, slightly packed
2 eggs
1 tbsp vanilla (note, not tsp)
3 cups all-purpose flour
1 tsp baking powder
1 tsp baking soda
1/2 tsp salt
2 to 2 1/2 cups chocolate chips
1. Whip butter until fluffy. Add each sugar slowly and mix until thoroughly creamed. Add eggs, one at a time, until each is fully incorporated. Add vanilla.
2. In separate bowl, combine flour, baking powder, soda and salt. Whisk until thoroughly combined. Dump entire amount into creamed mixture and mix until thoroughly combined. Add chocolate chips.
3. Cover mixture with plastic wrap (pressed onto dough) and refrigerate for 4 to 5 hours. Remove from fridge and form dough into evenly-sized balls. Place rows of balls in a freezable container (with a sealable lid) between sheets of waxed paper and freeze for several hours or up to a month.
4. To bake, heat oven to 375. Place frozen balls on ungreased cookie sheet and bake for 10 minutes. Remove from oven and let pan cool for 20 minutes before removing cookies to a wire rack for final cooling.
Substitution Suggestions: One word ... don't! OK, a few more words. You can add nuts, but I wouldn't mess with the ratios of this recipe in any other way. And, I wouldn't increase the chocolate content beyond 2 1/2 cups. (A regular-sized bag holds 2 cups, but I buy mine in bulk.) In this case, too much chocolate is not a good thing.
Lessons Learned: This recipe calls for more sugar and flour than the recipe on the back of the Nestle bag. It also calls for a lot more vanilla. The vanilla really sings in these cookies. It's not offensively strong, but the perfect balance with the chocolate.
I read once upon a time (I think it was in Cooks Illustrated) that eggs added one at a time incorporate into a batter or dough faster than adding them all at once. The one-at-a-time process also creates a better rise. It has something to do with the science, which I don't understand, but it does work. So, only add eggs one at a time.
By mixing the dry ingredients separately before adding them to the creamed mixture, you ensure that the baking soda and powder are thoroughly integrated. Otherwise, you could get pockets of powder or soda and who wants to taste that? Not me.
I think the biggest key to this recipe's success is that the dough is frozen before it's baked, and then its baked from its frozen state and it finishes baking on a hot, but cooling sheet once you pull it out of the oven. In short, the cookie bakes very slowly throughout the entire process. The cookies will still look somewhat raw after 10 minutes. The cookie goddess (CG) says you can leave them in the oven for 12 minutes at most, but I pulled mine out after 10. I also dialed my oven down to 350 since my oven runs 25 degrees hot. Make sure you know your oven's true temperature, not the temperature you set it to.
The CG measures each ball of dough before it's frozen. Because she sells them, she has to make sure each one is 2 ounces. I used a one-ounce scoop for mine and kept the cooking time to 10 minutes. If you make bigger balls, you may need to increase the time slightly.
I baked mine on one rack with a pizza stone underneath (to help regulate the heat). The CG bakes two rows at a time.
One final note: CG said that she's shared this recipe with others, but they can't manage to duplicate it. She may have shared it with me, expecting that I too would fail and thus leave her safely in her role as the cookie goddess. As long as I don't try to sell these cookies, I don't think she'll mind that I can now make them as well as she can. If you don't get super-soft cookies, leave me a comment and I'll troubleshoot the problem with you. And, let me know what you think of the recipe!
Showing posts with label dessert. Show all posts
Showing posts with label dessert. Show all posts
Friday, June 18, 2010


Sunday, May 23, 2010
Fake Donuts
I eat donuts maybe once a year. And even then, the donuts must be yeasted donuts -- no cake donuts for me, thank you very much. I figure if I'm going to inject myself with wasteful calories, I want something more interesting than rainbow sprinkles, bad icing and crumbly, dried-out cake. I found this recipe a few years ago in an issue of Real Simple and was intrigued. Could this recipe satisfy my kids' desire for donuts? I finally tried it several weeks ago. It hit the spot for all of us and I've actually had two donuts this year ... so far. The middles were perfectly doughy without being undercooked. The outsides had the perfect amount of crispness and flake (thanks to all the butter in the canned biscuits that I used). It's a two-thumbs up recipe for a last-minute dessert.

Fake Donuts
3/4 cup vegetable oil
1 8-count package large refrigerated biscuits (such as Pillsbury Grands)
1/2 cup sugar
1/4 teaspoon ground cinnamon
1. Heat 1/2 cup of the oil in a medium skillet over medium-low heat.
2. Place the biscuits on a cutting board. Using a 1-inch round cookie cutter or shot glass, cut a hole in the center of each biscuit, reserving the extra dough for "holes."
3. Test the heat of the oil by dipping the edge of a doughnut in the pan. When the oil is hot enough, the edge will bubble. Place 4 of the doughnuts and holes in the skillet and cook until golden brown, 1 to 1½ minutes per side. Transfer to a wire rack or paper towel–lined plate to drain. Add the remaining oil to the skillet, reheat, and cook the remaining doughnuts and holes.
4. In a large bowl, combine the sugar and cinnamon. Gently toss the warm doughnuts in the mixture a few at a time. Serve warm or at room temperature.
Substitution Suggestions: Honestly, this recipe is as straight forward as they come. I've only used Pillsbury Flaky Grands and been happy with the results. If you want donut holes instead of the larger donuts, just press down on the biscuit slightly, then use your cookie cutter to cut lots of holes. The holes cook much faster than the full biscuits.
Lessons Learned: I've made this recipe twice now. The trick is to keep the oil hot enough to fry the donuts, but not so hot that the outsides burn before the insides are thoroughly cooked. (Yes, I made that mistake the first time around.) And, they do burn easily. I flipped the donuts several times each and that seemed to help.
I didn't have a cookie cutter small enough, but the plastic storage tube that came with my Pampered Chef grapefruit slicer is the perfect size for punching out the center hole.
Thursday, April 22, 2010
Alton Brown's Crepes
There's a wonderful little restaurant called La Creperie Cafe in the Belmont Shores district of Long Beach, Calif. This place has wonderful crepes -- sweet crepes, savory crepes, appetizer crepes, plain crepes, fancy crepes, you name it. They are delectable in every way, shape and form. Made from whole wheat (without the dry whole wheat mouth-feel), these crepes are the epitome of comfort food. My dear friend Jacky and his beautiful wife, Anne Marie, introduced my family to this restaurant. And, every time I go back to California, I insist on a visit. The atmosphere is great, too -- Bohemian French bistro (I wrote a restaurant review of it for Hungry? Family Edition -- Los Angeles.)
After my introduction to crepes, I searched for a recipe to try them at home. Alton Brown's aren't quite as good as La Creperie's, but they are still pretty good. And, I can't quite re-create the crepe carbonara to match the restaurant's, but whenever I make my version, I get compliments.
This recipe is great for savory and sweet crepes. I like to make a full batch, then split it and add the sweetness to half and the savory to the other half to feed my family of four.
Alton Brown's Crepes
2 large eggs
3/4 cup milk
1/2 cup water
1 cup flour
3 tbsp butter, melted
Butter for the pan
1. Combine all ingredients in a blender and pulse for 10 seconds (you may need to scrape down the sides partway through).
2. Refrigerate for 1 hour to allow air bubbles to release (if the batter has too many bubbles, the crepe will tear when you cook it).
3. Heat small non-stick pan. Add butter to coat. Pour 1 ounce of batter into the center of the pan and swirl to spread evenly. Cook for 30 seconds and flip. Cook for another 10 seconds and remove to the cutting board. Lay them out flat so they can cool. Continue until all batter is gone.
4. After they have cooled you can stack them and store in sealable plastic bags in the refrigerator for several days or in the freezer for up to two months. When using frozen crepes, thaw on a rack before gently peeling apart.
Substitution Suggestions: For sweet crepes, add 2 1/2 tbsp sugar, 1 tsp vanilla and 2 tbsp liqueur of choice (I use a few drops of almond extract instead of the liqueur). For savory crepes, add 1/4 tsp salt and 1/4 cup herbs of choice (or sun-dried tomatoes or spinach).
I fill my savory crepes with a cheese sauce (made from a roux with added onion and garlic), grilled chicken and bacon. If I'm feeling ambitious, I'll also add mushrooms and olives.
For my sweet crepes, I'll use cinnamon sugar or bananas and Nutella and strawberries. The French usually eat them with a little jam. For more ideas and inspiration, visit lacreperiecafe.net and look at the menu.
Lessons Learned: Letting the batter sit for an hour really does make a difference. I've tried it both ways, and letting the batter de-bubble really does affect how well the crepe holds together.
When you pour the batter and swirl it in the pan, let it sit over medium-high heat until the edges start to pull up. I jiggle the pan back and forth until it moves on its own. Once it does that, I flip it. You could use tongs or a fork, but you risk tearing the crepe. With a little practice, flipping becomes easy. (I was actually so aggressive with my flip on the most recent crepe night that I flipped it 360 instead of just 180!)
The sky is the limit when filling these. My kids like them with peanut butter. I like the carbonara. Next time, I might try taking inspiration from California Pizza Kitchen's menu to come up with a Thai crepe or something equally exotic.
After my introduction to crepes, I searched for a recipe to try them at home. Alton Brown's aren't quite as good as La Creperie's, but they are still pretty good. And, I can't quite re-create the crepe carbonara to match the restaurant's, but whenever I make my version, I get compliments.
This recipe is great for savory and sweet crepes. I like to make a full batch, then split it and add the sweetness to half and the savory to the other half to feed my family of four.
Alton Brown's Crepes
2 large eggs
3/4 cup milk
1/2 cup water
1 cup flour
3 tbsp butter, melted
Butter for the pan
1. Combine all ingredients in a blender and pulse for 10 seconds (you may need to scrape down the sides partway through).
2. Refrigerate for 1 hour to allow air bubbles to release (if the batter has too many bubbles, the crepe will tear when you cook it).
3. Heat small non-stick pan. Add butter to coat. Pour 1 ounce of batter into the center of the pan and swirl to spread evenly. Cook for 30 seconds and flip. Cook for another 10 seconds and remove to the cutting board. Lay them out flat so they can cool. Continue until all batter is gone.
4. After they have cooled you can stack them and store in sealable plastic bags in the refrigerator for several days or in the freezer for up to two months. When using frozen crepes, thaw on a rack before gently peeling apart.
Substitution Suggestions: For sweet crepes, add 2 1/2 tbsp sugar, 1 tsp vanilla and 2 tbsp liqueur of choice (I use a few drops of almond extract instead of the liqueur). For savory crepes, add 1/4 tsp salt and 1/4 cup herbs of choice (or sun-dried tomatoes or spinach).
I fill my savory crepes with a cheese sauce (made from a roux with added onion and garlic), grilled chicken and bacon. If I'm feeling ambitious, I'll also add mushrooms and olives.
For my sweet crepes, I'll use cinnamon sugar or bananas and Nutella and strawberries. The French usually eat them with a little jam. For more ideas and inspiration, visit lacreperiecafe.net and look at the menu.
Lessons Learned: Letting the batter sit for an hour really does make a difference. I've tried it both ways, and letting the batter de-bubble really does affect how well the crepe holds together.
When you pour the batter and swirl it in the pan, let it sit over medium-high heat until the edges start to pull up. I jiggle the pan back and forth until it moves on its own. Once it does that, I flip it. You could use tongs or a fork, but you risk tearing the crepe. With a little practice, flipping becomes easy. (I was actually so aggressive with my flip on the most recent crepe night that I flipped it 360 instead of just 180!)
The sky is the limit when filling these. My kids like them with peanut butter. I like the carbonara. Next time, I might try taking inspiration from California Pizza Kitchen's menu to come up with a Thai crepe or something equally exotic.
Thursday, November 12, 2009
The Perfectly Flaky Pie Crust
There are certain foods that every cook never quite masters. It's different for each person: perfectly smooth creme brulee, non-lumpy gravy, a moist turkey, cookies that stay soft for days. For me, it has been the ever-elusive, perfectly flaky pie crust. Try as I might (and believe me, I've tried), it's always too tough, too soggy, too dry, too bland, too salty, too brown, too pale, too something. Every time. Until now. Thanks to allrecipes.com, I have finally created the perfect pie crust. Perfectly flaky, perfectly browned, perfectly salted, perfectly crispy -- "practically perfect in every way." And now I'm going to share it with you. You can thank me later.
Perfectly Flaky Pie Crust
2 cups flour
1 cup butter-flavored shortening
1 tsp. salt
1/2 cup ice-cold water
1. Combine flour and salt in a bowl and stir until combined. Chill for at least 15 minutes. Chill the shortening for at least the same amount of time.
2. Cut shortening into the flour mixture with a fork or pastry cutter until clumps form no larger than the size of your baby fingernail. Do not over mix and do not put your hands in the mix.
3. Add ice-cold water one tablespoon at a time and gently toss until combined. The dough will begin to ball on its own.
4. Separate dough into two balls and wrap each in plastic wrap. Chill in fridge for at least 30 minutes. (At this stage, the dough can be frozen for later use.)
5. Liberally flour large wooden cutting board. Flour rolling pin. Remove one dough ball, unwrap and press down gently onto floured board. Roll into 10-inch circle, turning the dough often to make sure it doesn't stick.
6. Fold in half, then into quarters. Set it into 9-inch pie plate and unfold. Prick bottom and sides. Fill pie.
7. Repeat rolling steps with other dough ball and place on top of pie. Trim edges to about 1/2 inch overhang. Press down to seal top and bottom layers, then fold top crust under bottom crust and crimp. Cut four steam vents in crust.
8. Bake according to pie directions.
Substitution Suggestions: You can use 1/2 cup butter to replace half of the shortening. Just make sure it is very cold.
Lessons Learned: Oh, the lessons I've learned trying to make pie crust. I think the biggest thing is that it really does require that much fat to get the light, crispy, flaky crust. So your arteries might clog thinking about that much cholestrerol, but as long as you keep the portion size down, it's a happy mouth-feel indulgence.
I wouldn't bother with a food processor. This really took no time at all to mix up with a pastry cutter. It helped that the shortening was chilled (15 minutes in the freezer was the perfect timing for me).
I floated a few ice cubes in my water to keep it cold and measured out 8 tablespoons (which equal a half cup) one at a time, tossing it into the flour-shortening mixture.
It is very sticky, and by very, I mean that if you don't use a lot of flour, it will stick to your board, to your rolling pin, to your fingers and anything else it touches. I actually rolled it out between two heavily floured sheets of waxed paper. It stuck a little, but I was able to gently pull it off. I may add an extra quarter cup of flour into the mix next time to see if it reduces the stickiness. Since I can't roll a perfect circle yet, I was able to piece together the areas that needed a little patching.
Just before it goes in the oven, consider brushing it with an egg wash (equal parts water and egg). It'll give the nicely browned crust coveted by bakers. Don't brush the edge, though, because that tends to brown quickly without any extra help.
I baked my filled pie (chicken pot pie) at 425 degrees for about 35 minutes and rotated it at the 20-minute mark since the back of my oven runs a little hot. I could tell as soon as I pulled it out of the oven that I had finally achieved pie crust perfection.
Perfectly Flaky Pie Crust
2 cups flour
1 cup butter-flavored shortening
1 tsp. salt
1/2 cup ice-cold water
1. Combine flour and salt in a bowl and stir until combined. Chill for at least 15 minutes. Chill the shortening for at least the same amount of time.
2. Cut shortening into the flour mixture with a fork or pastry cutter until clumps form no larger than the size of your baby fingernail. Do not over mix and do not put your hands in the mix.
3. Add ice-cold water one tablespoon at a time and gently toss until combined. The dough will begin to ball on its own.
4. Separate dough into two balls and wrap each in plastic wrap. Chill in fridge for at least 30 minutes. (At this stage, the dough can be frozen for later use.)
5. Liberally flour large wooden cutting board. Flour rolling pin. Remove one dough ball, unwrap and press down gently onto floured board. Roll into 10-inch circle, turning the dough often to make sure it doesn't stick.
6. Fold in half, then into quarters. Set it into 9-inch pie plate and unfold. Prick bottom and sides. Fill pie.
7. Repeat rolling steps with other dough ball and place on top of pie. Trim edges to about 1/2 inch overhang. Press down to seal top and bottom layers, then fold top crust under bottom crust and crimp. Cut four steam vents in crust.
8. Bake according to pie directions.
Substitution Suggestions: You can use 1/2 cup butter to replace half of the shortening. Just make sure it is very cold.
Lessons Learned: Oh, the lessons I've learned trying to make pie crust. I think the biggest thing is that it really does require that much fat to get the light, crispy, flaky crust. So your arteries might clog thinking about that much cholestrerol, but as long as you keep the portion size down, it's a happy mouth-feel indulgence.
I wouldn't bother with a food processor. This really took no time at all to mix up with a pastry cutter. It helped that the shortening was chilled (15 minutes in the freezer was the perfect timing for me).
I floated a few ice cubes in my water to keep it cold and measured out 8 tablespoons (which equal a half cup) one at a time, tossing it into the flour-shortening mixture.
It is very sticky, and by very, I mean that if you don't use a lot of flour, it will stick to your board, to your rolling pin, to your fingers and anything else it touches. I actually rolled it out between two heavily floured sheets of waxed paper. It stuck a little, but I was able to gently pull it off. I may add an extra quarter cup of flour into the mix next time to see if it reduces the stickiness. Since I can't roll a perfect circle yet, I was able to piece together the areas that needed a little patching.
Just before it goes in the oven, consider brushing it with an egg wash (equal parts water and egg). It'll give the nicely browned crust coveted by bakers. Don't brush the edge, though, because that tends to brown quickly without any extra help.
I baked my filled pie (chicken pot pie) at 425 degrees for about 35 minutes and rotated it at the 20-minute mark since the back of my oven runs a little hot. I could tell as soon as I pulled it out of the oven that I had finally achieved pie crust perfection.
Saturday, September 26, 2009
Apple, Pear and Cranberry Crisp
Sometimes a recipe comes along that requires zero improvement. That is the case with this one, which I found on the Food Network website. It is an Ina Garten original. Though I don't enjoy watching her show, The Barefoot Contessa, I did enjoy this recipe in all of its beautiful simplicity. The tartness of the apples, the sweetness of the pears, the little sour red nuggets of unexpected cranberry -- it melds on the fork and in the mouth for the perfect embodiment of an autumnal evening.
The recipe is a cinch to put together if you have an apple corer-peeler-slicer gadget. I can't imagine creating this recipe without one. Enjoy!
Apple, Pear and Cranberry Crisp
2 pounds ripe Bosc pears (4 pears)
2 pounds firm Macoun apples (6 apples)
3/4 cup dried cranberries
1 tsp grated orange zest
1 tsp grated lemon zest
2 tbsp freshly squeezed orange juice
2 tbsp freshly squeezed lemon juice
1/2 cup granulated sugar
1/4 cup all-purpose flour
1 tsp ground cinnamon
1/2 teaspoon ground nutmeg
For the topping:
1 tsp cinnamon
1 1/2 cups all-purpose flour
3/4 cup granulated sugar
3/4 cup light brown sugar, lightly packed1/2 teaspoon kosher salt
1 cup old-fashioned oatmeal
1/2 pound (2 sticks) cold unsalted butter, diced
1. Preheat the oven to 350 degrees.
2. Peel, core and cut the pears and apples into large chunks and place in a large bowl. Add dried cranberries.
3. In a separate small bowl, combine the zests, juices, sugar, flour, cinnamon, and nutmeg. Pour over fruit and toss until coated. Pour into a 9-by-12-by 2-inch baking dish.
4. For the topping, combine the flour, sugars, cinnamon, salt, oatmeal and butter in the bowl of an electric mixer fitted with the paddle attachment. Mix on low speed for 1 minute, until the mixture is in large crumbles. Sprinkle evenly over the fruit, covering the fruit completely.
5. Place the baking dish on a sheet pan and bake for 50 minutes to 1 hour, until the top is brown and the fruit
is bubbly. Serve warm.
Substitution Suggestions: I couldn't find Macoun apples (pronounced MacCowan), but Granny Smiths will work just fine. The tartness nicely juxtaposes the sweetness of the pears.
Lessons Learned: Instead of cooking this in a casserole dish, I packed the apple mixture into foil muffin cup liners (paper liners will not work because of the juices) and topped each individual serving with the crumb topping. Aside from requiring a little extra care to get the cups out of the muffin pans, it was the perfect small serving at a dessert potluck. I wanted individual, stand-alone foil cups, but was out of luck after searching three grocery stores, Bed, Bath & Beyond, Sur La Table and Williams Sonoma. If you cook this in individual servings, whether with liners or in ramekins, it only requires 30 minutes of cooking as opposed to the casserole's 50 minutes.
There is one very small addition to Ina's original recipe. I added some cinnamon to the crumb topping. It just seemed wrong to leave it out.
The recipe is a cinch to put together if you have an apple corer-peeler-slicer gadget. I can't imagine creating this recipe without one. Enjoy!
Apple, Pear and Cranberry Crisp
2 pounds ripe Bosc pears (4 pears)
2 pounds firm Macoun apples (6 apples)
3/4 cup dried cranberries
1 tsp grated orange zest
1 tsp grated lemon zest
2 tbsp freshly squeezed orange juice
2 tbsp freshly squeezed lemon juice
1/2 cup granulated sugar
1/4 cup all-purpose flour
1 tsp ground cinnamon
1/2 teaspoon ground nutmeg
For the topping:
1 tsp cinnamon
1 1/2 cups all-purpose flour
3/4 cup granulated sugar
3/4 cup light brown sugar, lightly packed1/2 teaspoon kosher salt
1 cup old-fashioned oatmeal
1/2 pound (2 sticks) cold unsalted butter, diced
1. Preheat the oven to 350 degrees.
2. Peel, core and cut the pears and apples into large chunks and place in a large bowl. Add dried cranberries.
3. In a separate small bowl, combine the zests, juices, sugar, flour, cinnamon, and nutmeg. Pour over fruit and toss until coated. Pour into a 9-by-12-by 2-inch baking dish.
4. For the topping, combine the flour, sugars, cinnamon, salt, oatmeal and butter in the bowl of an electric mixer fitted with the paddle attachment. Mix on low speed for 1 minute, until the mixture is in large crumbles. Sprinkle evenly over the fruit, covering the fruit completely.
5. Place the baking dish on a sheet pan and bake for 50 minutes to 1 hour, until the top is brown and the fruit
is bubbly. Serve warm.
Substitution Suggestions: I couldn't find Macoun apples (pronounced MacCowan), but Granny Smiths will work just fine. The tartness nicely juxtaposes the sweetness of the pears.
Lessons Learned: Instead of cooking this in a casserole dish, I packed the apple mixture into foil muffin cup liners (paper liners will not work because of the juices) and topped each individual serving with the crumb topping. Aside from requiring a little extra care to get the cups out of the muffin pans, it was the perfect small serving at a dessert potluck. I wanted individual, stand-alone foil cups, but was out of luck after searching three grocery stores, Bed, Bath & Beyond, Sur La Table and Williams Sonoma. If you cook this in individual servings, whether with liners or in ramekins, it only requires 30 minutes of cooking as opposed to the casserole's 50 minutes.
There is one very small addition to Ina's original recipe. I added some cinnamon to the crumb topping. It just seemed wrong to leave it out.
Monday, August 10, 2009
Peach Rum Granita
My husband and I are hooked on watching the Next Food Network Star show. The winner was announced a week ago and her first show aired this Sunday. It was admittedly a little uncomfortable to watch. Melissa was pretty frazzled and nervous ... and it showed. But, she'll get better as she settles into her new role. In honor of her victory (which I rooted for from almost the beginning), I decided to try my first granita. She made hers with unsweetened applesauce and a little lemon juice. I went a little fancier and was pleased with the result. It was the perfect cool ending to a scorcher of a day. This recipe easily serves four.
Peach Rum Granita
3 cups peach puree
1 cup sugar
1 cup water
1 tbsp lemon or lime juice
3/4 tsp rum extract
1/4 tsp salt
6 mint leaves
1. Combine sugar, water and mint leaves (can substitute mint basil) in small saucepan. Bring to boil, then simmer over medium heat for five minutes. Discard mint leaves. Remove pan from heat and cool slightly. This creates a simple syrup.
2. In blender, combine peach puree, lemon juice, rum extract, salt and 1/2 cup simple syrup. Blend and taste. Add more syrup or lemon juice according to sweetness preference.
3. Pour mixture into shallow, freezer-safe container and freeze for four hours, scraping and fluffing the mixture with a fork every 30 minutes or until mixture is completely frozen.
Lessons Learned: This really is a simple, refreshing (and fat free!) dessert for a hot summer night. The mint adds an additional hinted layer of flavor. I debated whether to use almond or rum extract. After smelling and tasting the peach puree, I went with the rum. If you're not a teetotaler like me, you can use the real thing, but you'll obviously need to adjust your liquid content of the simple syrup.
The peach puree is left from when I picked peaches a few weeks ago. To make a puree, skin the peaches, then blend the peaches with a little lemon or lime juice (this helps prevent browning and adds a little acidity to cut the sweetness). I suppose you could use canned peaches, but why? Fresh is so much better.
The amount of simple syrup does not need to be exact. It is to adjust the sweetness and help create a fluffier granita. I started with 1/2 cup of syrup, but ultimately used about 2/3 of a cup.
The recipe could also work with other fruits: watermelon, berries, melons, apricots, pineapple, etc. My son asked if we could do it with grapes. I don't know how well that would work, but I don't see why it wouldn't work with grape juice ... or any other juice for that matter.
Peach Rum Granita
3 cups peach puree
1 cup sugar
1 cup water
1 tbsp lemon or lime juice
3/4 tsp rum extract
1/4 tsp salt
6 mint leaves
1. Combine sugar, water and mint leaves (can substitute mint basil) in small saucepan. Bring to boil, then simmer over medium heat for five minutes. Discard mint leaves. Remove pan from heat and cool slightly. This creates a simple syrup.
2. In blender, combine peach puree, lemon juice, rum extract, salt and 1/2 cup simple syrup. Blend and taste. Add more syrup or lemon juice according to sweetness preference.
3. Pour mixture into shallow, freezer-safe container and freeze for four hours, scraping and fluffing the mixture with a fork every 30 minutes or until mixture is completely frozen.
Lessons Learned: This really is a simple, refreshing (and fat free!) dessert for a hot summer night. The mint adds an additional hinted layer of flavor. I debated whether to use almond or rum extract. After smelling and tasting the peach puree, I went with the rum. If you're not a teetotaler like me, you can use the real thing, but you'll obviously need to adjust your liquid content of the simple syrup.
The peach puree is left from when I picked peaches a few weeks ago. To make a puree, skin the peaches, then blend the peaches with a little lemon or lime juice (this helps prevent browning and adds a little acidity to cut the sweetness). I suppose you could use canned peaches, but why? Fresh is so much better.
The amount of simple syrup does not need to be exact. It is to adjust the sweetness and help create a fluffier granita. I started with 1/2 cup of syrup, but ultimately used about 2/3 of a cup.
The recipe could also work with other fruits: watermelon, berries, melons, apricots, pineapple, etc. My son asked if we could do it with grapes. I don't know how well that would work, but I don't see why it wouldn't work with grape juice ... or any other juice for that matter.
Saturday, July 25, 2009
Seared Peaches with Balsamic Glaze
 I went peach picking yesterday and now have a counter filled with ripe and almost ripe peaches. The original goal was to grill some with dinner, but Mother Nature rained out my plans. So, I had to go with Plan B. When I read that Cooking Light billed this recipe as one that would taste straight out of an upscale restaurant, I figured it was worth a shot. Too bad I was missing half the ingredients and didn't feel like a run to the store in the rain. Never fear. I'm getting good at substitutes, so that's what I did here. Below is the original recipe in case your pantry and fridge are better stocked than mine. In Lessons Learned, I detail how I altered it to make it my own.
Seared Peaches and Figs with Balsamic Glaze
1 teaspoon black peppercorns
2 teaspoons butter, divided
2 teaspoons chopped fresh thyme, divided
4 firm ripe white peaches (about 1 3/4 pounds), halved and pitted
8 firm ripe Black Mission figs, halved lengthwise (about 1 pound)
1/3 cup balsamic vinegar
1/3 cup crème fraîche
1/8 teaspoon salt
1. Cook peppercorns in a small skillet over medium heat 6 minutes or until fragrant and toasted. Cool. Place peppercorns in a heavy-duty zip-top plastic bag; seal. Crush peppercorns with a meat mallet or rolling pin; set aside.
2. Melt 1 teaspoon butter in a large skillet over medium-high heat; stir in 1 teaspoon thyme. Add peaches, cut sides down, to pan. Cook 2 minutes or until browned. Remove from pan. Place 1 peach half, cut sides up, on each of 8 plates. Melt remaining 1 teaspoon butter in pan; stir in remaining 1 teaspoon thyme. Add figs, cut sides down, to pan; cook 2 minutes or until browned. Place two fig halves on each plate.
3. Add vinegar to pan; cook over medium-low heat until reduced to 3 tablespoons (about 3 minutes). Cool slightly. Spoon about 2 teaspoons crème fraîche into the center of each peach half; drizzle about 1 teaspoon vinegar mixture over each serving. Sprinkle each serving with about 1/8 teaspoon pepper. Sprinkle evenly with salt.
Serves 8
Lessons Learned: I didn't have figs or creme fraiche and I didn't feel like roasting pepper corns. So, here's what I did: After mentally halving the recipe, I cut the peaches into quarters. I had semi-cling peaches, so separating them into pretty halves just wasn't an option. They were firm enough, however, that I could separate them into quarters. I tossed them into a saute pan with 1 teaspoon of butter. (I forgot to add the thyme.) They didn't quite reach the carmelization that I wanted, so I tossed them into a cake pan, added a dash of salt over them and stuck them under the broiler for a few minutes. Perfect results -- nice carmelization and color with just the right amount of natural sweetness.
As stated, I didn't have creme fraiche, but sour cream will work as a quick substitute. I mixed in about a tablespoon of sugar to a half cup of sour cream and let it sit until the sugar dissolved. I didn't feel like reducing balsamic vinegar, but I have an absolutely decadent and concentrated balsamic glaze from Williams Sonoma. I served up the peaches with a few drops of that glaze on each peach, then topped them with the sour cream mixture (no pepper). Simply divine and ready to go in less than 10 minutes! This will definitely be a go-to recipe in case I need a quick dessert for unannounced guests.
One final note, don't ever bother buying the $2 bottle of balsamic vinegar. It's cheap and completely lacking in balsamic flavor. You'll use three times as much of it as you will a more concentrated version and you still won't like the results. I won't buy anything other than the Olivier brand at Williams Sonoma. It is thick, fruity and not very vinegary, unlike that cheap stuff you find on the top shelf of the salad dressing aisle at the grocery store. Sure, it's $24/bottle, but one taste and you'll never want to use anything else again.
Sunday, June 28, 2009
Lemon Custard Pie
Something about summer just screams lemon meringue to me. I'm not typically a huge lemon fan, but I really enjoy lemon meringue when the weather is hot. Light, airy and cool -- it's an ideal combination. While I love the burst of citrus, I'm not so fond of the giggly, translucent Jell-O-like substance that is typical of lemon pies at most diner-type establishments. So, I went in search of something better.
I found this recipe, which is more custard than gelatinous. It was heavenly! There was just enough lemon to give me that burst of citrus that I love, but the sugar and milk really toned down the acidity to yield a delightful dish that I loved serving to friends last night. Like usual, I didn't follow the directions exactly as I found them. (Who wants to bother with a double-boiler anyhow?) And with that, I give you ...
Lemon Custard Pie
1 9-inch baked pie shell
1 cup sugar
6 tbsp cornstarch
1/4 tsp salt
2 cups milk
3 egg yolks, slightly beaten
3 tbsp butter
1/3 cup lemon juice
1 tbsp lemon zest
1. Bake pie crust according to directions and cool.
2. Combine sugar, cornstarch and salt in heavy saucepan. Turn heat to medium-low and slowly add milk, stirring constantly. Increase heat to medium-high and continue stirring until mixture thickens, about 15 minutes. (Turn heat down if mixture boils more than an occasional bubble.)
3. Cover, lower heat to low and cook for 10 minutes, stirring occasionally.
4. Gradually add 1/2 cup of mixture to 3 egg yolks, stirring constantly so the eggs don't scramble. Slowly pour the egg mixture into the pot and stir until blended. Cook for another 5-6 minutes, stirring constantly.
5. Remove from heat and add butter, lemon juice and zest. Stir until fully incorporated.
6. Pour into separate container and lightly press plastic wrap on the top of the custard so a film doesn't form. Stir every 10 minutes until cool.
7. Pour into prepared pie crust when cool. Refrigerate until serving. Top with whipped cream and serve.
Lessons Learned: I served it with whipped cream instead of meringue because A) it was easier, B) I didn't feel like making a meringue, C) I didn't want to turn the oven on, and D) who doesn't love having an excuse to buy a can of whipped cream, which can eventually be shot straight into the mouth when no one is looking! The meringue would have been pretty, but the whipped cream was just as good.
The cook who posted this recipe on a Cooking Light message board (no, I don't think it's a light recipe) said it was very time consuming. I didn't think so. I was done with it in less than an hour.
If you want to make it lighter, go with fat-free milk. I did half fat-free and half whole since I don't like the thin, wimpy flavor of fatless milk. I also didn't use the full amount of butter.
The end result was a soft yellow and definitely opaque custard that spooned beautifully into my pie crust (which was store bought since I can't figure out how to make a decent crust to save my life!). I would never dream of adding food coloring to this custard. I have another pie crust in the freezer. I think I'll have to make it again in the near future since I obviously forgot to take a picture before we ate this one.
Last thought, you really should stir constantly, scraping the bottom of the pan as you go, so you don't get lumps.
I found this recipe, which is more custard than gelatinous. It was heavenly! There was just enough lemon to give me that burst of citrus that I love, but the sugar and milk really toned down the acidity to yield a delightful dish that I loved serving to friends last night. Like usual, I didn't follow the directions exactly as I found them. (Who wants to bother with a double-boiler anyhow?) And with that, I give you ...
Lemon Custard Pie
1 9-inch baked pie shell
1 cup sugar
6 tbsp cornstarch
1/4 tsp salt
2 cups milk
3 egg yolks, slightly beaten
3 tbsp butter
1/3 cup lemon juice
1 tbsp lemon zest
1. Bake pie crust according to directions and cool.
2. Combine sugar, cornstarch and salt in heavy saucepan. Turn heat to medium-low and slowly add milk, stirring constantly. Increase heat to medium-high and continue stirring until mixture thickens, about 15 minutes. (Turn heat down if mixture boils more than an occasional bubble.)
3. Cover, lower heat to low and cook for 10 minutes, stirring occasionally.
4. Gradually add 1/2 cup of mixture to 3 egg yolks, stirring constantly so the eggs don't scramble. Slowly pour the egg mixture into the pot and stir until blended. Cook for another 5-6 minutes, stirring constantly.
5. Remove from heat and add butter, lemon juice and zest. Stir until fully incorporated.
6. Pour into separate container and lightly press plastic wrap on the top of the custard so a film doesn't form. Stir every 10 minutes until cool.
7. Pour into prepared pie crust when cool. Refrigerate until serving. Top with whipped cream and serve.
Lessons Learned: I served it with whipped cream instead of meringue because A) it was easier, B) I didn't feel like making a meringue, C) I didn't want to turn the oven on, and D) who doesn't love having an excuse to buy a can of whipped cream, which can eventually be shot straight into the mouth when no one is looking! The meringue would have been pretty, but the whipped cream was just as good.
The cook who posted this recipe on a Cooking Light message board (no, I don't think it's a light recipe) said it was very time consuming. I didn't think so. I was done with it in less than an hour.
If you want to make it lighter, go with fat-free milk. I did half fat-free and half whole since I don't like the thin, wimpy flavor of fatless milk. I also didn't use the full amount of butter.
The end result was a soft yellow and definitely opaque custard that spooned beautifully into my pie crust (which was store bought since I can't figure out how to make a decent crust to save my life!). I would never dream of adding food coloring to this custard. I have another pie crust in the freezer. I think I'll have to make it again in the near future since I obviously forgot to take a picture before we ate this one.
Last thought, you really should stir constantly, scraping the bottom of the pan as you go, so you don't get lumps.
Wednesday, April 22, 2009
Better-than-Sex Cake
I belong to an organization that meets twice a month to discuss the ins and outs of parenting. We take turns bringing food to share and I have been asked to bring my Better-than-Sex cake to the next meeting. I didn't name the cake; nor will I comment on my opinion of its name. Just understand that the cake is incredibly easy ... and incredibly good. After eating it, you will need to find a way to burn the calories (eh hem!) :)
Better-than-Sex Cake
1 box chocolate cake mix
1 jar caramel ice cream topping
1 tub Cool Whip or other whipped topping
1/2 to 3/4 cup crushed Heath bar or toffee bits
1. Bake chocolate cake according to box directions. Cool.
2. With the end of a wooden spoon, poke holes in the cake every inch to two inches. Pour caramel topping over top of the cake and allow to soak in.
3. Top with Cool Whip.
4. Sprinkle with crushed Heath bar. Cover and chill until ready to serve.
Lessons learned: This recipe really is as easy as it sounds. I've also heard this called Better-than-Anything cake, but I prefer the other title (as long as children aren't around). Any chocolate cake mix will do: chocolate, devil's food, German chocolate, etc.
If you don't have caramel ice cream topping (I prefer Smuckers in the jar), you can use a small can of condensed milk for the same effect. One version of the recipe calls for BOTH the condensed milk AND the caramel topping. That's too much sweetness for me. Contrary to the belief of some, you can have too much of a good thing -- cake and other things.
You can buy Heath bar precrushed. It's next to the chocolate chips in the baking aisle. If you can't find a toffee bar or candy, just use crushed chocolate chips. The result won't be as good, but it'll be close.
This is a great throw-it-together dish for a dessert potluck if you're more interested in getting it done than impressing everyone with your culinary abilities. Regardless, people will ask for the recipe.
Better-than-Sex Cake
1 box chocolate cake mix
1 jar caramel ice cream topping
1 tub Cool Whip or other whipped topping
1/2 to 3/4 cup crushed Heath bar or toffee bits
1. Bake chocolate cake according to box directions. Cool.
2. With the end of a wooden spoon, poke holes in the cake every inch to two inches. Pour caramel topping over top of the cake and allow to soak in.
3. Top with Cool Whip.
4. Sprinkle with crushed Heath bar. Cover and chill until ready to serve.
Lessons learned: This recipe really is as easy as it sounds. I've also heard this called Better-than-Anything cake, but I prefer the other title (as long as children aren't around). Any chocolate cake mix will do: chocolate, devil's food, German chocolate, etc.
If you don't have caramel ice cream topping (I prefer Smuckers in the jar), you can use a small can of condensed milk for the same effect. One version of the recipe calls for BOTH the condensed milk AND the caramel topping. That's too much sweetness for me. Contrary to the belief of some, you can have too much of a good thing -- cake and other things.
You can buy Heath bar precrushed. It's next to the chocolate chips in the baking aisle. If you can't find a toffee bar or candy, just use crushed chocolate chips. The result won't be as good, but it'll be close.
This is a great throw-it-together dish for a dessert potluck if you're more interested in getting it done than impressing everyone with your culinary abilities. Regardless, people will ask for the recipe.
Monday, April 20, 2009
Berry Chocolate Mascarpone Tart
There's a grocery store in the East that is my haven from the ho hum supermarkets that normally claim my hard-earned dollars. If you have never been to Wegmans, you must visit. I take all of my out-of-town guests there because it really is that good. Really! Anyhow, my local Wegmans, which opened up just before Thanksgiving 2008, has a fabulous cheese counter. Thanks to their generous sampling policies, I am now hooked on Comte (a French cow's milk cheese with a smooth finish) and Midnight Moon (a domestic goat cheese with caramel undertones). Every time I go, I try a new cheese. I bought mascarpone for the first time a few weeks ago. And then it sat in my fridge ... and sat ... and sat until the "Use By" date came. So, I was "forced" to use it or lose it last night. The following is an adaptation I found in one of my many magazines. Since it's enough different from the original recipe, I think I can call it my own. Enjoy!
Berry Chocolate Mascarpone Tart
1/2 cup unsalted almonds
1/2 cup sugar
2 cups all purpose flour
4 oz (1 stick) cold unsalted butter, cut into 1/2-inch chunks
1 teaspoon almond extract
ice cold water as needed
1 tsp. almond extract
1/8 tsp. salt
9 tbsp. cocoa
4 tbsp. butter
1 1/2 cup powdered sugar, divided
1/4 cup milk or half-and-half
1/2 cup heavy whipping cream
1 tsp vanilla
8 oz. mascarpone cheese
1. In food processor, process almonds and sugar until finely ground. (Do not turn into a butter!) Add butter, almond extract, salt and flour. Pulse until the mixture turns crumbly. Add enough water and pulse in processor until mixture forms a ball. Place in tart pan. (If using a pan that does not have a removable bottom, grease the pan for easier release. Or, use parchment paper.) Bake at 350 for 15 minutes or until edges begin to brown. Cool.
2. In small pan over very low heat, combine cocoa and butter. Stir until butter melts, then add 3/4 cup powdered sugar and dash of salt. Continue stirring. Add milk or half-and-half until the chocolate reaches a thick syrup consistency. Pour over almond crust and spread to within 1/2 in of the edge of the crust. Cool.
3. In medium bowl, whip heavy cream until stiff peaks form. Add 3/4 cup powdered sugar, vanilla and mascarpone. Whip until fully incorporated and the marscarpone lumps are gone. Spread on top of chocolate.
4. Top with fresh berries and serve immediately or cover and refrigerate overnight.
Lessons learned: This isn't the exact recipe that I made. I had to fudge some things (as usual). I was out of chocolate chips, so I pulled out the cocoa and did it the hard way. Otherwise, I would have used semi-sweet chips with a little butter and milk to create the chocolate ganache. That would have been much easier, but the result here was just as good; perhaps better. If you go this route, don't add all the sugar at once. Taste it as you go until you reach the desired sweetness. Because everything else is so sweet, this does need a little bitterness so you don't get a sugar rush.
The original recipe called for whipping cream, which is what I've stated here. I didn't have any on hand so I used a packet of Dream Whip and a 1/2 cup of whole milk. I omitted the sugar (Dream Whip has plenty in it already) and reduced the amount of vanilla. It worked like a charm! If you want a really white cream, use clear vanilla instead of the brown stuff.
I topped the dessert with thawed raspberries. Fresh would have been much better, but I liked the syrup run-off of the frozen ones.
It keeps well for a day, but probably not more than that. It shouldn't be a problem, though, because this is so good, I doubt you'll have leftovers.
Berry Chocolate Mascarpone Tart
1/2 cup unsalted almonds
1/2 cup sugar
2 cups all purpose flour
4 oz (1 stick) cold unsalted butter, cut into 1/2-inch chunks
1 teaspoon almond extract
ice cold water as needed
1 tsp. almond extract
1/8 tsp. salt
9 tbsp. cocoa
4 tbsp. butter
1 1/2 cup powdered sugar, divided
1/4 cup milk or half-and-half
1/2 cup heavy whipping cream
1 tsp vanilla
8 oz. mascarpone cheese
1. In food processor, process almonds and sugar until finely ground. (Do not turn into a butter!) Add butter, almond extract, salt and flour. Pulse until the mixture turns crumbly. Add enough water and pulse in processor until mixture forms a ball. Place in tart pan. (If using a pan that does not have a removable bottom, grease the pan for easier release. Or, use parchment paper.) Bake at 350 for 15 minutes or until edges begin to brown. Cool.
2. In small pan over very low heat, combine cocoa and butter. Stir until butter melts, then add 3/4 cup powdered sugar and dash of salt. Continue stirring. Add milk or half-and-half until the chocolate reaches a thick syrup consistency. Pour over almond crust and spread to within 1/2 in of the edge of the crust. Cool.
3. In medium bowl, whip heavy cream until stiff peaks form. Add 3/4 cup powdered sugar, vanilla and mascarpone. Whip until fully incorporated and the marscarpone lumps are gone. Spread on top of chocolate.
4. Top with fresh berries and serve immediately or cover and refrigerate overnight.
Lessons learned: This isn't the exact recipe that I made. I had to fudge some things (as usual). I was out of chocolate chips, so I pulled out the cocoa and did it the hard way. Otherwise, I would have used semi-sweet chips with a little butter and milk to create the chocolate ganache. That would have been much easier, but the result here was just as good; perhaps better. If you go this route, don't add all the sugar at once. Taste it as you go until you reach the desired sweetness. Because everything else is so sweet, this does need a little bitterness so you don't get a sugar rush.
The original recipe called for whipping cream, which is what I've stated here. I didn't have any on hand so I used a packet of Dream Whip and a 1/2 cup of whole milk. I omitted the sugar (Dream Whip has plenty in it already) and reduced the amount of vanilla. It worked like a charm! If you want a really white cream, use clear vanilla instead of the brown stuff.
I topped the dessert with thawed raspberries. Fresh would have been much better, but I liked the syrup run-off of the frozen ones.
It keeps well for a day, but probably not more than that. It shouldn't be a problem, though, because this is so good, I doubt you'll have leftovers.
Friday, March 13, 2009
Dump (Fruit Pan Dowdy)
I know the name doesn't sound appetizing and last night's example was definitely not worth a photo, but since several people asked for the recipe, it must have turned out OK from a flavor perspective. In short, it's a fruit cobbler without all the work of a cobbler. So, here is one of my favorite last-minute recipes for a tasty and sweet dessert.
Dump (Fruit Pan Dowdy)
2 large cans canned fruit (peaches, apples or cherries)
3 tbsp cornstarch
1 tsp cinnamon
2 tsp vanilla
1/2 tsp almond extract
1 box white or yellow cake mix
1/2 cup butter or margarine (1 cube)
1 cup chopped pecans or walnuts (optional)
1. Pour contents of fruit cans (including syrup) into pan. Measure cornstarch into a small bown and add a little water until cornstarch dissolves. Add to fruit and stir over medium heat.
2. Stir in cinnamon, vanilla and almond extract. Continue to stir until mixture starts to boil and thickens. Stir until desired thickness is reached (no more than another minute or two).
3. Dump mixture into large glass dish (Pyrex works well).
4. Dump dry cake mix over the top and spread across the mixture.
5. Slice one cube butter into thin pats and spread it generously over the top of the cake mix.
6. If desired, sprinkle chopped pecans or walnuts over the top.
7. Bake at 350 for about an hour or until the top has browned.
Lessons Learned: I've called this Dump for years because you literally dump everything in. It's painfully easy to make and requires little thought. I've made it with apples, peaches and cherries, though peaches are my favorite. There's no reason why you couldn't mix fruits (say, peaches and apricots or pears and apples). Be creative.
You can use pie filling and omit the cornstarch and flavoring process, but canned fruit is so much cheaper and works just as well with a little extra effort. Depending on the brand of fruit, you may want to remove some, but not all, of the syrup. Too much syrup makes the dish mushy, which is fine from a flavor perspective, but definitely not from a mouth feel standpoint.
If your baking pan is pretty full, put it on a cookie sheet before sliding it into the oven. It'll be easier to pull out and you won't have caramelized syrup drippings at the bottom of your oven. If you're in a hurry, increase the temperature to 375 and start watching it for doneness after about 30 minutes. (The more butter you add, the more golden your crust will become and the better your cobbler will taste.)
It's best served very warm and a la mode. Whipped cream also works.
Dump (Fruit Pan Dowdy)
2 large cans canned fruit (peaches, apples or cherries)
3 tbsp cornstarch
1 tsp cinnamon
2 tsp vanilla
1/2 tsp almond extract
1 box white or yellow cake mix
1/2 cup butter or margarine (1 cube)
1 cup chopped pecans or walnuts (optional)
1. Pour contents of fruit cans (including syrup) into pan. Measure cornstarch into a small bown and add a little water until cornstarch dissolves. Add to fruit and stir over medium heat.
2. Stir in cinnamon, vanilla and almond extract. Continue to stir until mixture starts to boil and thickens. Stir until desired thickness is reached (no more than another minute or two).
3. Dump mixture into large glass dish (Pyrex works well).
4. Dump dry cake mix over the top and spread across the mixture.
5. Slice one cube butter into thin pats and spread it generously over the top of the cake mix.
6. If desired, sprinkle chopped pecans or walnuts over the top.
7. Bake at 350 for about an hour or until the top has browned.
Lessons Learned: I've called this Dump for years because you literally dump everything in. It's painfully easy to make and requires little thought. I've made it with apples, peaches and cherries, though peaches are my favorite. There's no reason why you couldn't mix fruits (say, peaches and apricots or pears and apples). Be creative.
You can use pie filling and omit the cornstarch and flavoring process, but canned fruit is so much cheaper and works just as well with a little extra effort. Depending on the brand of fruit, you may want to remove some, but not all, of the syrup. Too much syrup makes the dish mushy, which is fine from a flavor perspective, but definitely not from a mouth feel standpoint.
If your baking pan is pretty full, put it on a cookie sheet before sliding it into the oven. It'll be easier to pull out and you won't have caramelized syrup drippings at the bottom of your oven. If you're in a hurry, increase the temperature to 375 and start watching it for doneness after about 30 minutes. (The more butter you add, the more golden your crust will become and the better your cobbler will taste.)
It's best served very warm and a la mode. Whipped cream also works.
Sunday, February 15, 2009
Chocolate Crinkle Cookies
 When I think about my dad, two things come to mind: chocolate and his tickle gun. In my formative years, we always had chocolate chip or chocolate crinkle cookies around. And if we were out of those, we definitely had brownies. My parents came to visit us last weekend in DC and the weekend was not complete without chocolate crinkle cookies. Though I made them, the recipe comes from the recipe he's been using for years.
Chocolate Crinkle Cookies
½ cup vegetable oil
6 Tbsp. cocoa**
2 Tbsp. shortening**
2 cups sugar
4 eggs
2 tsp. vanilla
1/2 tsp almond extract
2 cups flour
½ tsp. salt
2 tsp. baking powder
Powdered sugar
1. Combine cocoa and shortening, heat in microwave until shortening is melted.**
2. Combine oil, cocoa mixture and sugar. Add vanilla, then add salt, flour and baking powder.
3. Cover and chill for several hours.
4. Drop teaspoon of dough into powdered sugar, roll around and shape into balls.
5. Place about 2 inches apart on greased baking sheet.
6. Bake 10-12 minutes at 350.
**Can also use 4 sq. unsweetened chocolate (4 oz.) melted in place of melted shortening and cocoa.
Lessons Learned: I never have bars of unsweetened chocolate around, so I always use the cocoa powder/shortening blend. These cookies really do need to chill before you roll them out. Otherwise, you get mush. I think the original recipe comes from Betty Crocker. Since these are my cookies, they have a little almond extract in them. It helps enhance the flavor of the chocolate. You can increase the almond extract if you like. I probably dumped a full teaspoon in by accident, but it didn't ruin the cookies.
Monday, February 2, 2009
Fortune Cookies
I hosted a Chinese New Year party a few days ago and thought it would be fun to make my own fortune cookies. These are surprisingly easy to make. From what I could tell, they were a hit. (If they hadn't been, I would have had a picture to post with this since I forgot to take a picture before the party started.)
Fortune Cookies
2 egg white
1/2 tsp vanilla extract
1/4 tsp almond extract
1/4 tsp salt
1/2 cup unbleached all-purpose flour
1/2 cup white sugar
2 tbsp water
1. Preheat oven to 400. Butter a cookie sheet. Write fortunes on strips of paper about 4 inches long and 1/2 inch wide. Generously grease 2 cookie sheets.
2. Mix the egg white and vanilla and almond extracts until foamy but not stiff. Sift the flour, salt, and sugar and blend into the egg white mixture. Add water.
3. Place teaspoonfuls of the batter at least 4 inches apart on a prepared cookie sheets. Tilt the sheet to move the batter into round shapes about 3 inches in diameter. Be careful to make batter as round and even as possible. Do not make too many, because the cookie have to be really hot to form them and once they cool it is too late. Start with 2 or 3 to a sheet and see how many you can do.
4. Bake for 5 minutes or until cookie has turned a golden color 1/2 inch wide around the outer edge of the circle. The center will remain pale. While one sheet is baking, prepare the other.
5. Remove from oven and quickly move cookie with a wide spatula and place upside down on a wooden board. Quickly place the fortune on the cookie, close to the middle and fold the cookie in half. Fold in half again and place it in a muffin tin or egg carton to hold the shape until firm.
Make 20 cookies
Lessons Learned: Since I have no idea how to fold fortune cookies like the prepackaged ones at Chinese take-out places, I simply folded these in half and then in half again. I printed fortunes from a site I found on Google, then cut them into thin strips.
I beat the eggs until they almost formed peaks. Then I folded in the other ingredients. You'll lose a lot of the volume from the whipped eggs, but that doesn't seem to affect the final product. The original recipe did not call for water, but I found that adding it decreased the cake-iness of the cookie. I like my fortune cookies crisp.
You must work fast. The cookies took about six minutes to bake, with me turning the sheet once during baking. You'll know they're done when the edges have turned a medium brown color. Do just four at a time. Otherwise, the cookies will harden before you get the fortunes in them. I folded the cookies and put each one in a metal muffin tin cup to help then hold their shape until they cooled. You'll need to grease the cookie sheet for each batch.
I couldn't get the middles completely hard and the sugar in the cookie can stick to the paper, so it might be best to use something other than printer paper for the fortunes.
Fortune Cookies
2 egg white
1/2 tsp vanilla extract
1/4 tsp almond extract
1/4 tsp salt
1/2 cup unbleached all-purpose flour
1/2 cup white sugar
2 tbsp water
1. Preheat oven to 400. Butter a cookie sheet. Write fortunes on strips of paper about 4 inches long and 1/2 inch wide. Generously grease 2 cookie sheets.
2. Mix the egg white and vanilla and almond extracts until foamy but not stiff. Sift the flour, salt, and sugar and blend into the egg white mixture. Add water.
3. Place teaspoonfuls of the batter at least 4 inches apart on a prepared cookie sheets. Tilt the sheet to move the batter into round shapes about 3 inches in diameter. Be careful to make batter as round and even as possible. Do not make too many, because the cookie have to be really hot to form them and once they cool it is too late. Start with 2 or 3 to a sheet and see how many you can do.
4. Bake for 5 minutes or until cookie has turned a golden color 1/2 inch wide around the outer edge of the circle. The center will remain pale. While one sheet is baking, prepare the other.
5. Remove from oven and quickly move cookie with a wide spatula and place upside down on a wooden board. Quickly place the fortune on the cookie, close to the middle and fold the cookie in half. Fold in half again and place it in a muffin tin or egg carton to hold the shape until firm.
Make 20 cookies
Lessons Learned: Since I have no idea how to fold fortune cookies like the prepackaged ones at Chinese take-out places, I simply folded these in half and then in half again. I printed fortunes from a site I found on Google, then cut them into thin strips.
I beat the eggs until they almost formed peaks. Then I folded in the other ingredients. You'll lose a lot of the volume from the whipped eggs, but that doesn't seem to affect the final product. The original recipe did not call for water, but I found that adding it decreased the cake-iness of the cookie. I like my fortune cookies crisp.
You must work fast. The cookies took about six minutes to bake, with me turning the sheet once during baking. You'll know they're done when the edges have turned a medium brown color. Do just four at a time. Otherwise, the cookies will harden before you get the fortunes in them. I folded the cookies and put each one in a metal muffin tin cup to help then hold their shape until they cooled. You'll need to grease the cookie sheet for each batch.
I couldn't get the middles completely hard and the sugar in the cookie can stick to the paper, so it might be best to use something other than printer paper for the fortunes.
Sunday, February 1, 2009
Lemon Lover's Cookies
My friend Sabrina shared some melt-in-your-mouth cookies with me at Christmastime and ever since, I've been anxious to get the recipe. What stuck out to me is that the recipe calls for cornstarch.
Fast forward two weeks -- My brother gave me a gift subscription to Taste of Home magazine. The following recipe, a version of the one Sabrina had, was one of the featured recipes. I finally tried it this afternoon and holy lemony goodness -- these are good, or as my husband would say, De-Lish!
Lemon Lover's Cookies
3/4 cup butter, softened
3 tbsp sugar
2 tsp lemon juice
1 1/4 cups all-purpose flour
1/2 cup cornstarch
1 tsp lemon peel, grated
Lemon Frosting
1/4 cup butter, softened
1 cup confectioners' sugar
2 tsp lemon juice
1 tsp lemon peel, grated
1. In small bowl, cream butter and sugar until light and fluffy.
2. Beat in lemon juice.
3. Combine flour, cornstarch and lemon peel; gradually add to creamed mixture and mix well.
4. Shape into 1 1/2 inch roll; wrap in plastic wrap and refrigerate for 1 hour or until firm.
5. Unwrap and cut into 1/4 inch slices.
6. Place 2 inches apart on ungreased baking sheets and bake at 350 for 8-10 minutes or until edges are golden brown. Cool completely on pans on wire racks.
Frosting
1. In small bowl beat butter until fluffy.
2. Add confectioners' sugar, lemon juice and peel, and beat until smooth.
3. Spread over cooled cookes; sprinkle with additional lemon peel if desired. Let stand until set. Store in an airtight container.
Lessons Learned: This recipe really is as easy as it sounds, and yes, you really need 1/2 cup of cornstarch. That's what makes them melt in your mouth. Some bakers say that their cookies fall apart. I didn't have too many problems with that. A few were too delicate to handle the move from cookie sheet to plate, so they ended up in my mouth. Darn! These cookies remind me of a spring morning. They would be perfect as part of a brunch or tea party. I'd post a picture, but they disappear pretty fast.
Fast forward two weeks -- My brother gave me a gift subscription to Taste of Home magazine. The following recipe, a version of the one Sabrina had, was one of the featured recipes. I finally tried it this afternoon and holy lemony goodness -- these are good, or as my husband would say, De-Lish!
Lemon Lover's Cookies
3/4 cup butter, softened
3 tbsp sugar
2 tsp lemon juice
1 1/4 cups all-purpose flour
1/2 cup cornstarch
1 tsp lemon peel, grated
Lemon Frosting
1/4 cup butter, softened
1 cup confectioners' sugar
2 tsp lemon juice
1 tsp lemon peel, grated
1. In small bowl, cream butter and sugar until light and fluffy.
2. Beat in lemon juice.
3. Combine flour, cornstarch and lemon peel; gradually add to creamed mixture and mix well.
4. Shape into 1 1/2 inch roll; wrap in plastic wrap and refrigerate for 1 hour or until firm.
5. Unwrap and cut into 1/4 inch slices.
6. Place 2 inches apart on ungreased baking sheets and bake at 350 for 8-10 minutes or until edges are golden brown. Cool completely on pans on wire racks.
Frosting
1. In small bowl beat butter until fluffy.
2. Add confectioners' sugar, lemon juice and peel, and beat until smooth.
3. Spread over cooled cookes; sprinkle with additional lemon peel if desired. Let stand until set. Store in an airtight container.
Lessons Learned: This recipe really is as easy as it sounds, and yes, you really need 1/2 cup of cornstarch. That's what makes them melt in your mouth. Some bakers say that their cookies fall apart. I didn't have too many problems with that. A few were too delicate to handle the move from cookie sheet to plate, so they ended up in my mouth. Darn! These cookies remind me of a spring morning. They would be perfect as part of a brunch or tea party. I'd post a picture, but they disappear pretty fast.
Tuesday, January 27, 2009
Ho-Ho Cake
 Today is National Chocolate Cake Day (and my nephew's fifth birthday), so I felt like celebrating. Not content to go with the standard chocolate box cake or even the secret family recipe (that isn't so secret or that phenomenal), I went on the hunt for ways to spruce up a box mix. I narrowed it down to two recipes, one of which is tried and true and other which is an experiment. I presented both options to my husband. "Honey, do you want better-than-sex or ho-ho?" You should have seen the expression on his face. What options! He went with the ho-ho (not sure how to take that!). So, I present to you the Ever So Decadent and Absolutely Sinful Ho-Ho Cake.
Ever So Decadent and Absolutely Sinful Ho-Ho Cake
1 package chocolate cake mix
5 tbsp flour
1 1/4 cups milk
3 tsp vanilla
1/2 tsp almond extract
1 tsp butter flavoring
Dash salt
1 cup sugar
1/2 cup margarine, softened
1 cup shortening
1/2 cup margarine, melted
1 tsp vanilla extract
1 egg or 1/4 cup egg substitute
1 1/2 tsp hot water
1 ounce unsweetened chocolate, melted
1 3/4 cups confectioner sugar
Dash of salt
1. Prepare cake mix according to box instruction. Pour into greased jelly roll pan and spread to the edges. Bake at 350 for 15-20 minutes or until firmly set. Cool completely.
2. Combine flour and milk in saucepan. Cook or medium high heat, stirring constantly, until mixture thickens. Remove from heat, add 3 tsp vanilla, almond extract and dash of salt. Cool completely.
3. Cream 1 cup sugar, 1/2 cup softened margarine, shortening and butter extract. Add cooled milk mixture and beat until fully incorporated.
4. Slice cake into four equal parts. Frost bottom section of cake with cream mixture. Layer the second layer and frost. Repeat with the third layer. Top with the final layer of cake and refrigerate.
5. In a small bowl, beat egg. Stir in vanilla, melted chocolate, hot water, confectioner sugar, 1/2 cup melted margarine and dash of salt until blended. Pour over cake and refrigerate.
Lessons learned: This cake is phenomenally good and yet so bad for you. I had originally hoped to roll the cake, but I baked it for 15 minutes, which wasn't quite long enough for it to hold its form, so I layered it instead. I think I liked the result better anyhow.
On the website where I found the original recipe, everyone complained about how bland the creamed mixture was. I solved that problem with some vanilla, almond extract, butter flavoring and a dash of salt (which I've included in this version of the recipe). I didn't do exact measurements on those, so just play with it until you like the taste. I was amazed at how the milk mixture made the frosting so creamy. I had expected a slight grit from the sugar, but it wasn't there.
For the chocolate frosting, if you're skittish about using a raw egg, go with Egg Beaters. I did. The original recipe didn't call for salt, but I recently read that when cooking with chocolate, a dash of salt will help mellow the bitterness and bring out the true flavor of the chocolate.
I didn't bother refrigerating the cake because I didn't want to wait until midnight to eat it. We will definitely be making this cake again.
Saturday, January 17, 2009
Thick and Creamy Hot Chocolate
I lived in the Dominican Republic for 18 months during my mid-20s. It was one of the best experiences of my life. In the last place I lived (I moved around a lot), I lived next to a flirty 30-something man named Miguel who loved to share food with me and my companion (I was a missionary). While I was unimpressed with his advances (and his chauvenistic marriage proposal just before I left), I was enamoured of the food he brought. Papaya was a particular favorite. He owned a farm and would sell fresh milk out of his house every morning. He always reserved a small pan of it for me and my companion. This milk tasted unlike any milk I was accustomed to and I didn't like it. But, not wanting to waste his generosity, we devised a way to make it more palatable -- oatmeal hot chocolate. Now I don't recommend this for everyday drinking since it does stick to the bones, but it was sure good. I have adapted the treat for a lighter version. I couldn't give you calorie values, but since I used fat-free milk and fat-free half and half, it can't be all bad, right?
Thick and Creamy Hot Chocolate
1 mug fat-free milk
1 mug fat-free half-and-half
2/3 cup rolled oats
2 tsp vanilla
1/4 tsp almond extract
1/4 cup sugar
2 tbsp cocoa powder
Dash of salt
1. Combine all ingredients in small saucepan over medium-high heat and whisk until cocoa is fully incorporated. Stir and continue to heat until bubbles form around edges, about five minutes.
2. Using a mesh colander, strain chocolate into mugs and discard oatmeal. Top with your favorite hot chocolate toppings.
Serves 2
Lessons learned: If you don't want to bother with the cocoa and sugar (and the cocoa takes some effort to incorporate), use a hot chocolate packet and omit the cocoa and sugar. You could probably omit the vanilla and salt, too, but I haven't tried it that way in more than 10 years, so you're on your own for that. If you feel that chucking the oatmeal is a waste, find a toddler and feed it to him or her. It was a hit with my 20-month-old daughter.
I didn't include a picture because one mug of hot chocolate looks just like the next mug of hot chocolate. It was, however, much thicker and creamier than the recipe I tried last weekend that called for cornstarch. I love the smoothness that the oatmeal gives to this recipe. And since it's a grain, it's healthy, right?!
Thick and Creamy Hot Chocolate
1 mug fat-free milk
1 mug fat-free half-and-half
2/3 cup rolled oats
2 tsp vanilla
1/4 tsp almond extract
1/4 cup sugar
2 tbsp cocoa powder
Dash of salt
1. Combine all ingredients in small saucepan over medium-high heat and whisk until cocoa is fully incorporated. Stir and continue to heat until bubbles form around edges, about five minutes.
2. Using a mesh colander, strain chocolate into mugs and discard oatmeal. Top with your favorite hot chocolate toppings.
Serves 2
Lessons learned: If you don't want to bother with the cocoa and sugar (and the cocoa takes some effort to incorporate), use a hot chocolate packet and omit the cocoa and sugar. You could probably omit the vanilla and salt, too, but I haven't tried it that way in more than 10 years, so you're on your own for that. If you feel that chucking the oatmeal is a waste, find a toddler and feed it to him or her. It was a hit with my 20-month-old daughter.
I didn't include a picture because one mug of hot chocolate looks just like the next mug of hot chocolate. It was, however, much thicker and creamier than the recipe I tried last weekend that called for cornstarch. I love the smoothness that the oatmeal gives to this recipe. And since it's a grain, it's healthy, right?!
Friday, January 16, 2009
Pavlova
 When my husband and I got married, a group of wonderfully talented women assembled an album of recipes for us. I say album because these recipes were scrapbooked onto 6x6 pages. I definitely have some favorites: cranberry and apricot pork tenderloin and chicken pillows readily come to mind (I will post them ... eventually). One of the most intimidating recipes in that three-album collection was a pavlova. I had never even heard of it, but it looked delightful!
After making creme brulee earlier this week, I had leftover egg whites that needed to be used or tossed. Pavlova, which is essentially the Australian take on a meringue, seemed the perfect fit, so I looked up some information on the confection and pulled out the Bosch to whip up some whites. While the recipe in my album is not the recipe I used yesterday, it was the inspiration. Below is the recipe, from elise.com, that I tried. I really liked the step-by-step instructions and accompanying photos that went with it. I am not yet coordinated enough to cook and snap photos at the same time. Eventually. In the meantime, here's pavlova, an Australian dessert inspired by the Russian ballerina Anna Pavlova.
Pavlova
Meringue:
1 1/2 teaspoons pure vanilla extract
1/2 teaspoon cream of tartar OR 2 teaspoons white wine vinegar OR distilled white vinegar
1 1/2 tbsp cornstarch
1 1/2 cups granulated sugar
3/4 cup (6 ounces, about 6) large egg whites at room temperature
Pinch salt
Topping:
2 pints fresh or frozen berries
1/4 cup sugar
Whipped cream
1. Preheat oven to 275. Line large baking sheet with parchment paper. Draw 8 to 10 3-inch wide circles on the parchment paper, then turn over the paper. Pour the vanilla and vinegar (if using) into a small cup. Stir the cornstarch into the sugar in a small bowl.
2. In a large bowl of a heavy-duty mixer, fitted with whisk attachment, whip egg whites, cream of tartar (if using) and salt, starting on low, increasing incrementally to medium speed until soft peaks/trails start to become visible, and the egg white bubbles are very small and uniform, approximately 2 to 3 minutes.
3. Increase speed to medium-high, slowly and gradually sprinkling in the sugar-cornstarch mixture. A few minutes after these dry ingredients are added, slowly pour in the vanilla and vinegar (if you didn't use cream of tartar.) Increase speed a bit and whip until meringue is glossy, and stiff peaks form when the whisk is lifted, 4 to 5 minutes.
4. Pipe or spoon meringue into 8-10 large round mounds using the pencil drawings as your guide. With the back of a spoon, create an indentation in the middle of the mound for holding the filling once meringue is baked.
5. Place baking sheet in the oven. Reduce oven temperature to 250. Bake for 50-60 minutes, or until the meringues are crisp, dry to the touch on the outside, and white -- not tan-colored or cracked. The interiors should have a marshmallow-like consistency. Check on meringues at least once during the baking time. If they appear to be taking on color or cracking, reduce temperature 25 degrees, and turn pan around.
6. Gently lift from the baking sheet and cool on a wire rack. Will keep in a tightly sealed container at room temperature, or individually wrapped, for up to a week if your house is not humid.
7. Served topped with your favorite filling - lemon curd, raspberry or blueberry sauce, and freshly whipped cream.
Sauce or Filling Directions
For a berry sauce, heat a couple pints of fresh or frozen berries in a medium saucepan with about a quarter cup of sugar. Heat on medium heat, stirring once or twice, for about 5 to 10 minutes, depending on how much the berries are falling aprt. Remove from heat and let cool.
Lessons learned: If you are intimidated by meringue, like I was until yesterday, the pictures that go with the link really do help. I have not posted them here because I don't want to deal with the copyright police. I used the cream of tartar option and the meringue behaved just like the instructions. Make sure that your bowl does not have a speck of oil in it. If it does, your eggs will not beat properly. Ideally, you should beat egg whites in a copper bowl -- a chemical reaction happens that yields a better beaten white than the same effort in other bowls.
I cooked the meringue a little longer than the prescribed amount of time and once it was done, I turned the oven off and let them cool in the oven. I did turn the pan partway through the cooking to just make sure it didn't burn.
The pan does not need to be greased, but you must use a gentle hand to remove the meringues. Otherwise, they will crack or fall apart. Also, I had more meringue than I could fit on one pan, so I threw the rest out.
The meringues will expand during cooking, so make sure your circles are not too close together. You do NOT want them to stick together. It ruins the beauty of the outer crust.
You can make this into one big dessert (which requires a longer cooking time), but I opted for the smaller ones. I stored the leftovers in zippered bags, then shared some this morning with two friends. Perhaps it was tacky, but I gave each of them a pudding cup to put on top of the meringue (the berries just wouldn't transport well and I didn't have whipped cream).
I like a sweeter berry, so I loaded up on sugar with my raspberries. It was still too tart and runny for my liking. If you want a thicker sauce, I suggest adding a cornstarch mixture into the berries if the sauce gets too watery.
I poured chocolate and caramel sauces over my son's dessert and he loved it. Chocolate also worked well with the raspberries (but then, chocolate goes with just about everything).
Saturday, January 10, 2009
5-Minute Chocolate Mug Cake
 This recipe comes courtesy of my friend Suzie. She received it as a forwarded e-mail. I've tried it twice, and though it still needs a little tweaking, it does satisfy a Saturday-afternoon chocolate craving.
5-Minute Chocolate Mug Cake
4 tbsp flour
4 tbsp sugar
2 tbsp cocoa
1 egg
3 tbsp milk
3 tbsp oil
3 tbsp chocolate chips (optional)
Small splash vanilla extract
1 large coffee mug
1. Add dry ingredients to mug and mix well. Add the egg and mix thoroughly.
2. Pour in the milk and oil. Mix well.
2. Add the chocolate chips (if using) and vanilla extract. Mix again.
3. Put your mug in the microwave and cook for 3 minutes at 1000 watts. The cake will rise over the top of the mug, but don't be alarmed!
4. Allow to cool a little, and tip out onto a plate if desired. (This can serve 2 if you want to feel slightly more virtuous).
Lessons learned: Lots of comments on this one. I used Egg Beaters in my recipe so I could do a half-recipe in a smaller mug (otherwise, how do you gracefully split half of one egg?). I added chocolate chips to both mugs, but in the future, I think I'll omit them. They don't add anything special and they disrupt the integrity of the cake, in my opinion. Also, I tried one with a splash of almond extract and the other with a splash of mint extract. The mint gets my vote. If you use a smaller mug (I used a Corelle mug), halve the recipe and nuke for two minutes, not three. My microwave is a 1500-watt nuker. I couldn't figure out how to cook it on a lower watt. If I had, perhaps the cake would have been a little springier and less dense. Maybe next time. If I were serving this to guests, I'd leave it in the mug and top with either whipped cream or a scoop of ice cream. It looks funny and slightly unappetizing when you dump it out onto a plate.
Thursday, January 8, 2009
World's Best (and Easiest) Brownies
This is, hands down, the best (and easiest) basic brownie recipe out there. I think it came out of my mom's red Betty Crocker cookbook, which was likely a wedding present when my parents got married back in the Dark Ages. At any rate, the recipe is incredibly easy and always comes out well (as long as the oven is up to temperature, which I had problems with once and ended up with raw brownies. Brownie batter is yummy, but not what you're expecting cooked brownies and serving them to a husband's co-worker/friend).
Brownies
2 eggs
1 cup sugar
¼ cup cocoa powder
4 tbsp shortening
4 tbsp butter
¾ cup flour
¾ cup nuts (optional)
2 tsp. vanilla
1/8 tsp baking powder
1. Melt shortening and butter, then add sugar.
2. Add all other ingredients, adding eggs on and a time and incorporating before adding the next one. Mix until combined.
3. Bake at 350 degrees for 30 minutes in greased glass dish.
Lessons learned: A few drops of almond extract and mint chocolate chips are really good in this recipe. So are chocolate chips. And I bet toffee bits would be tasty, too. The only thing that didn't work well in this recipe are marshmallows.
I usually double the recipe and up the cooking time by almost 20 minutes. They still stay soft and delicious. If I double the recipe, I use a Pyrex casserole dish. A single batch will fit comfortable in an 8x8 pan.
Brownies
2 eggs
1 cup sugar
¼ cup cocoa powder
4 tbsp shortening
4 tbsp butter
¾ cup flour
¾ cup nuts (optional)
2 tsp. vanilla
1/8 tsp baking powder
1. Melt shortening and butter, then add sugar.
2. Add all other ingredients, adding eggs on and a time and incorporating before adding the next one. Mix until combined.
3. Bake at 350 degrees for 30 minutes in greased glass dish.
Lessons learned: A few drops of almond extract and mint chocolate chips are really good in this recipe. So are chocolate chips. And I bet toffee bits would be tasty, too. The only thing that didn't work well in this recipe are marshmallows.
I usually double the recipe and up the cooking time by almost 20 minutes. They still stay soft and delicious. If I double the recipe, I use a Pyrex casserole dish. A single batch will fit comfortable in an 8x8 pan.
Peach Cinnamon Whirligigs
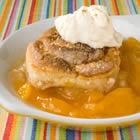 One of the first things I ever attempted to make as a child were Peach Cinnamon Whirligigs. The recipe came from a well-worn pamphlet sandwiched between Mom's Betty Crocker cookbook and her recipe box. I admit that the first try took about two hours and involved lots of questions (I was probably eight at the time). I've since perfected the prep time and can now do it in about 15 minutes. This recipe works well as a breakfast or a dessert. The Bisquick yields a pleasantly crumbly cinnamon roll unlike the yeasty versions. If you have home canned fruit available, try that instead of store-bought. I always double the recipe since it disappears quickly.
Peach Cinnamon Whirligigs
2 28 oz. cans peaches with syrup
2 tbsp cornstarch
1 tsp cinnamon
1 tsp vanilla
1 1/3 cups Bisquick
2 tbsp sugar
1 tbsp butter, melted
1/3 cup milk
2 tbsp butter, softened
1/4 cup sugar
1 tsp cinnamon
1. Combine cornstarch and 1 tsp cinnamon in glass. Add enough water to dissolve the cornstarch (no more than 1/2 cup). In a medium saucepan, combine peaches (with syrup), cornstarch mixture and vanilla.
2. Cook, stirring constantly over medium heat until mixture thickens and boils. Boil and stir 1 minute.
3. Mix Bisquick, 2 tbsp sugar, 2 tbsp melted butter and milk to form soft dough. Gently smooth dough into a ball on well-floured board. Knead 8 to 10 times (add extra Bisquick or flour if it's too sticky).
4. Roll dough into 9-inch square. Spread with 2 tbsp softened butter. Mix 1/4 cup sugar and 1 tsp cinnamon. Sprinkle over dough. Roll up; seal well by pinching edges of dough.
5. Pour peach mixture into square 8x8 pan. Cut roll into 1-inch slices, place cut side up on hot peach mixture.
6. Bake at 425 degrees for 20-25 minutes. Serve warm with cream or ice cream.
Lessons learned: If your pan is more than half full when it goes into the oven, put a cookie sheet underneath the pan. Otherwise, you risk having to clean up the burned syrup from the bottom of your oven.
Subscribe to:
Posts (Atom)